Visit Japan Web – What To Expect At The Airport

Once the plane is taxiing to the airport terminal, get ready to connect to the airport WIFI.
If you are traveling with elderly or kids, help them with their connection too.
Disembarkment
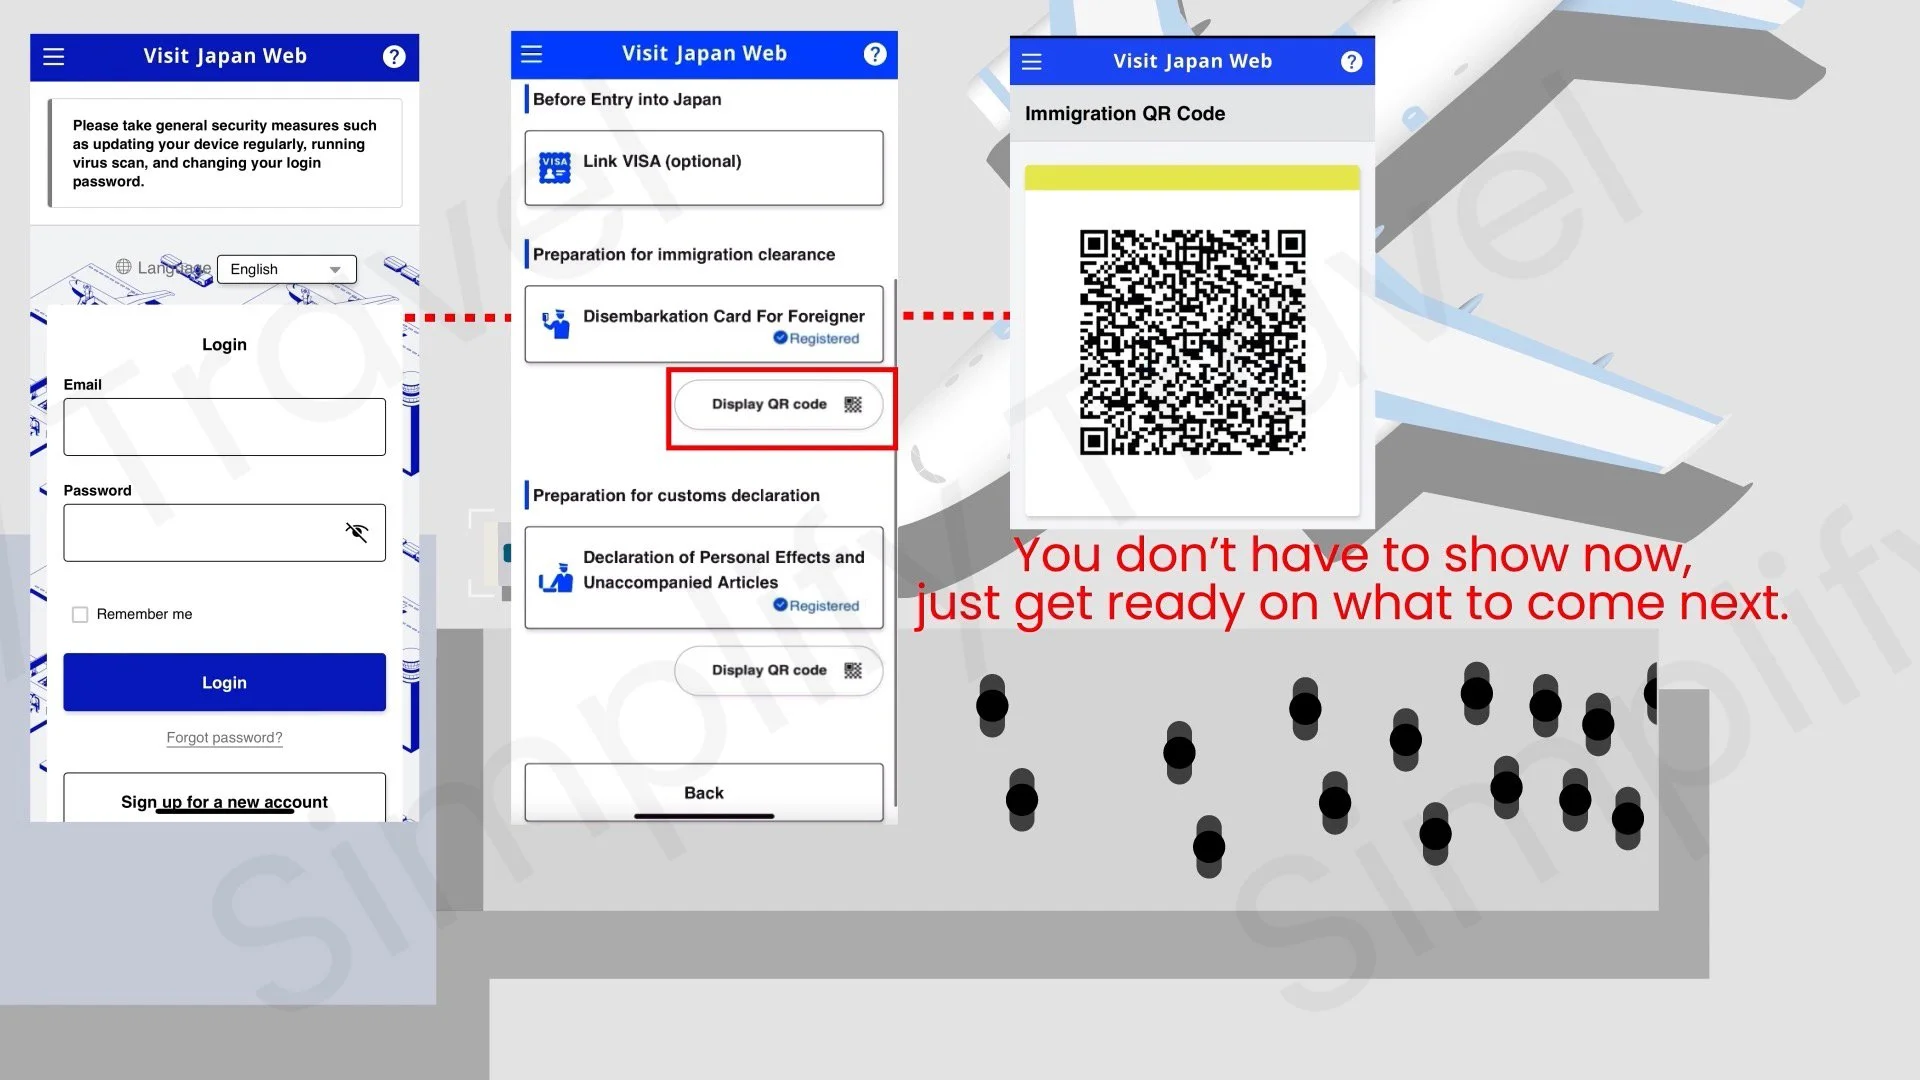
Once you disembark from the plane and connected to the airport WIFI, do log in to the Visit Japan Web. Just get ready to show the immigration QR code at the immigration checkpoint.
Next just proceed to the immigration checkpoint.
Immigration Checkpoint
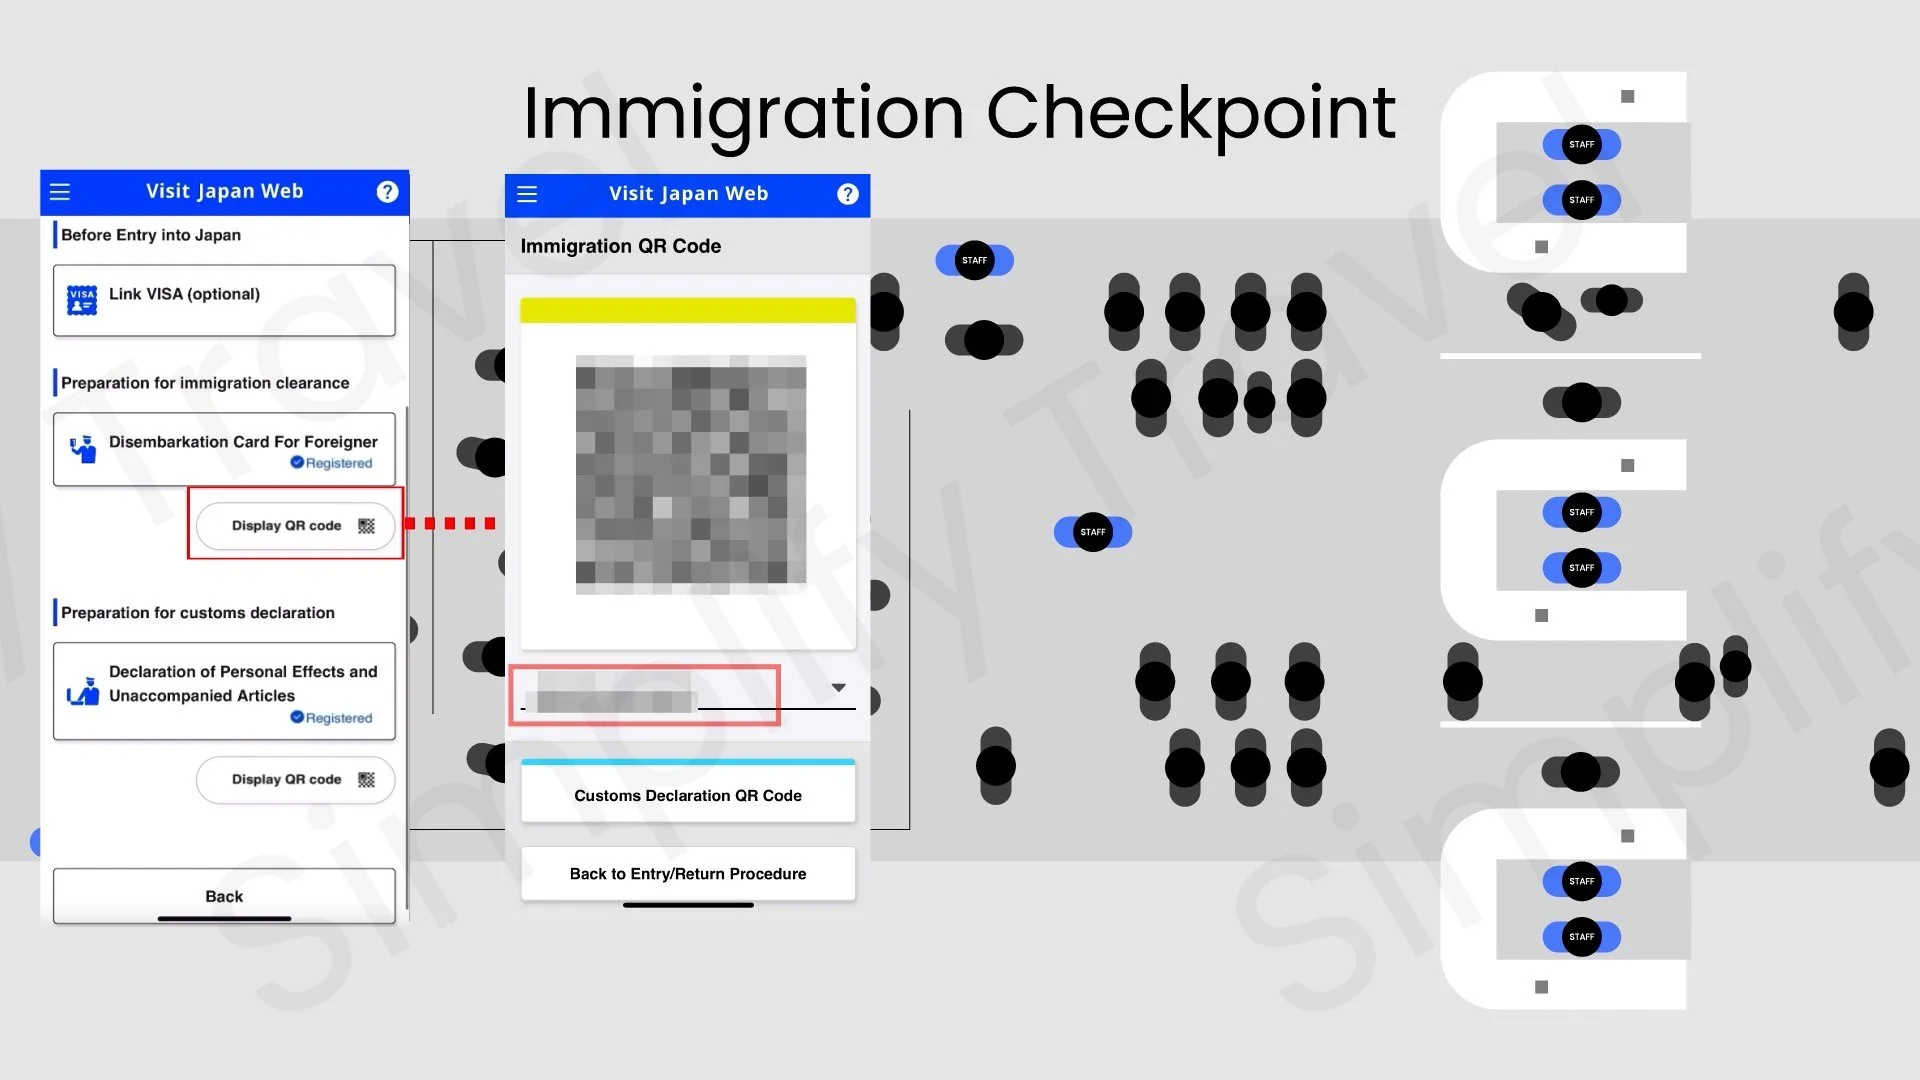
While queueing for your turn, get ready your passport and on the Visit Japan Web, go to the “preparation for immigration clearance” section, and select the “Display QR code”.
This will bring you to the “immigration QR Code”, with the yellow bar on top. Make sure the name appear is yours, if you are travel with family members.
When it’s your turn, give your passport and hold up your phone with the QR code and scan it on a small scanner on the counter.
After that, just wait for the immigration officer to clear your entry.

At this point, the immigration officer will affixed the landing permission seal onto your passport. It's crucial to check before leaving, because you'll require this seal to exchange your Japan Rail Pass and to create your tax-free QR code on the Visit Japan Web app. This QR code will enables you to make tax-free purchases by simply displaying it, eliminating the need to present your passport.
Customs Declaration Checkpoint
Once you clear the immigration checkpoint, you will proceed to the baggage claim area to collect your baggage.
The last checkpoint is the customs declaration. It is just beside the baggage claim area.

Once you collected your baggage, the airport staff will guide you to the electronic declaration terminal station.
When queueing, get ready your next QR code.
On your phone, go to the “preparation for customs declaration” section, and select the “Display QR Code”. Or, if your screen still remain on the previous “immigration QR Code” screen, just select the “customs declaration QR code” below your name.
It will then bring you to the “Customs Declaration QR Code”, with the light blue bar on the top. Make sure the name appear is yours, if you are travel with family members.
At the electronic declaration terminal station, follow what is shown on the screen and proceed accordingly and scan your last QR code on the machine.
Once you have registered on the station, you will then proceed to the electronic gate.
When queueing for your turn, if you still wear a mask, you should take off first so that the electronic gate machine can scan your face and open the gate for you to pass through.
After passing through the electronic gate, you will finally reach the arrival hall.
And welcome to Japan.

In Summary

At the immigration checkpoint 2, you need to show the immigration QR code.
At the immigration checkpoint 2, check whether your passport has the landing permission seal.
At the customs declaration checkpoint 3, you need to show the customs declaration QR code.
Affiliate Disclosure:
The links for ads may result in a small affiliate commission if you decide to purchase the recommended product at no additional cost to you.
-
Visit Japan Web Website - https://vjw-lp.digital.go.jp/en/
Visit Japan Web Instruction Manual - https://www.vjw.digital.go.jp/manual/main/visitjapanweb_manual_en.pdf
Mask Use - https://www.mhlw.go.jp/stf/seisakunitsuite/bunya/0000164708_00079.html